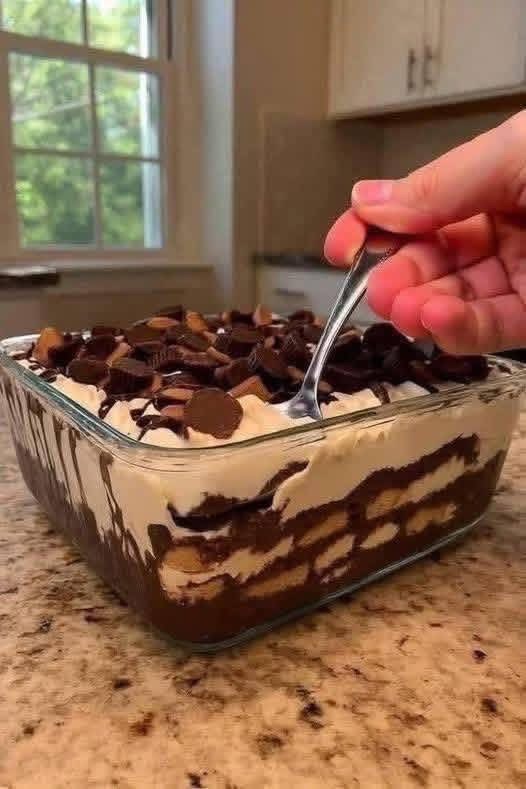
⏱️ Prep & Cook Time + Yield
Prep Time: 20 minutes
Chilling Time: 4 hours (or overnight)
Total Time: 4 hours 20 minutes
Yield: 6–8 servings
🛒 Ingredients List
The Base & Layers: 3 packs of sugar-free or regular rich tea/digestive biscuits (or your favorite layering cookies)
The Chocolate Core: 4 cups of prepared sugar-free chocolate pudding (or chocolate custard)
The Creamy Cloud: 2 cups of whipped heavy cream (or sugar-free whipped topping)
The Garnish (Optional Pro Touch): A handful of chopped sugar-free peanut butter cups or dark chocolate shavings for the crown.
🔪 Step-by-Step Instructions
1. Prepare the Station:
Get your serving dish ready (a clear glass square or rectangular baking dish works best to showcase those gorgeous layers).
2. The First Layer (Foundation):
Create a neat base layer by dipping your biscuits quickly into milk (or coffee/sugar-free cocoa if desired) and lining the bottom of the dish completely.
3. The Chocolate Tier:
Pour a smooth, even layer of the chocolate pudding over the biscuit base, spreading it gently with a spatula until fully covered.
4. Repeat the Structure:
Alternate layers—another layer of biscuits followed by another layer of rich chocolate pudding—until you reach near the top of your dish, finishing with a final layer of biscuits.
5. The Cream Crown:
Spread the whipped cream evenly across the top, creating a smooth, cloud-like finish.
6. Garnish & Chill:
Scatter your chopped toppings across the surface. Cover the dish tightly with plastic wrap and refrigerate for at least 4 hours (overnight is optimal) to allow the biscuits to soften and the flavors to meld into a cake-like texture.
✨ Chef’s Tips & Tricks
The Temperature Balance: Make sure your chocolate pudding is cooled to room temperature before layering so it doesn’t melt your whipped cream or toppings.
The Slice & Serve: Use a sharp, hot knife (dip it in warm water and wipe dry) if you want clean, sharp square portions when serving.
Texture Contrast: If you prefer a bit of a crunch rather than a cake-like softness, reduce the chilling time to just 2 hours!
What’s our next culinary adventure? Send over the next idea! 🍽️